


It retails for $44.95. We put our thinking caps on and decided we could make one ourselves for much less. Of course neither my husband or I have any experience in plumbing, but hey we're always up for an adventure.
Oh boy... we had a bit of an adventure for sure.
We started off at Lowes and talked to a guy that assumed all of our stuff was 3/8 inch (we now have to take all of it back) 2 days and a few trips to Home Depot later we have ourselves a diaper sprayer for a total of $20 and some change. Now we did do it a bit of an odd way and we chose to not have a separate shut off valve for the sprayer but for us it works out.
Here's how we did it...
Our materials:
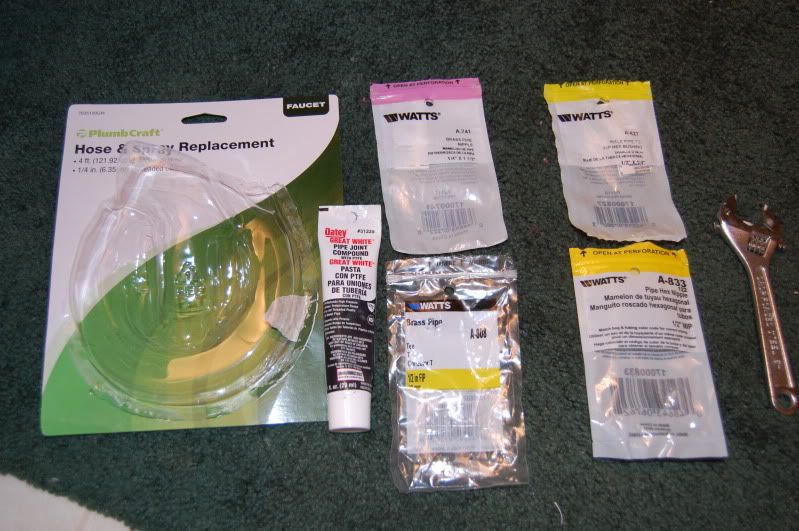
A wrench
(A)Hose & Spray Replacement - from Walmart for $7.97
(B)Watts brass pip T connector 1/2 in FIP (A-808) - from Home Depot $5.08
(C)Watts brass pipe nipple 1/4" X 1 1/2" (A741) - from Home Depot $3.15
(D)Watts male pipe to FIP hex bushing 1/2" X 1/4" (A827) - from Home Depot $2.80
(E)Watts Pipe Hex nipple 1/2" MIP (A-833) - from Home Depot $2.42
(F)Oatey Pipe Joint Compound, thread seal - from Home Depot $1.38
When explaining it I will just list the material letter in front of it so I don't have to retype the confusing names over and over.
We have 1/2" pipes coming out from the floor and the tube coming from the tank is 1/4". Some are 3/8" so you would need to check yours for sizing.
Don't forget to turn off the water valve on the floor (this is important!)
Also important, you want to rub the thread seal (F) onto the threading (the grooves for those of you who don't know what I'm talking about) on the pieces prior to screwing them in. This will keep it from leaking.
Here it is put together so you can picture it as you are reading
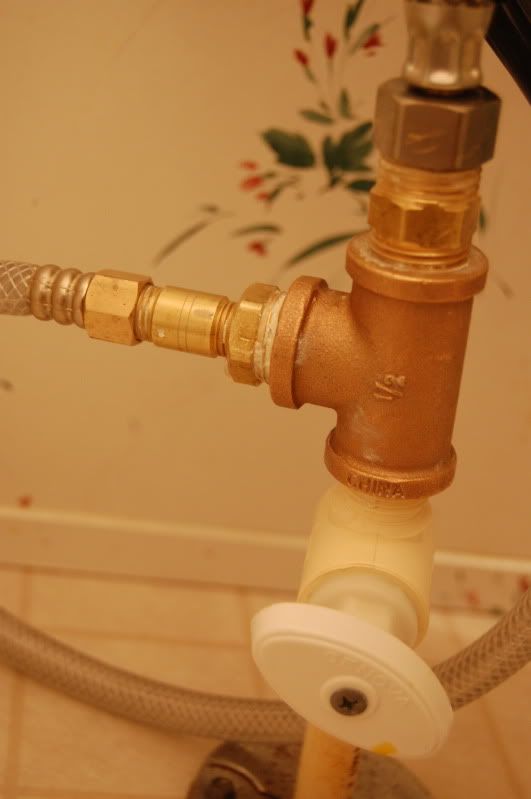
First you take A and screw it into the pipe coming up from the floor.
Next we had to use D to connect A to the pipe coming out of the tank. This is because A was 1/2" and the pipe from the tank is 1/4".
Next we needed to hook the sprayer hose up to A. To do this we had to put E in the side of A.
Next we attached C to E from there we could screw in the sprayer hose. The reason you have to have C and E is because you have to reduce down to 1/4".
Now you have your diaper sprayer :)
You do have the option of putting on a valve so that you only have water running to your sprayer when you need to use it. We didn't bother with that because it is in a guest bathroom that only gets used when people are over. If you want a valve you would simply put on a quarter turn valve prior to screwing on the spray hose.
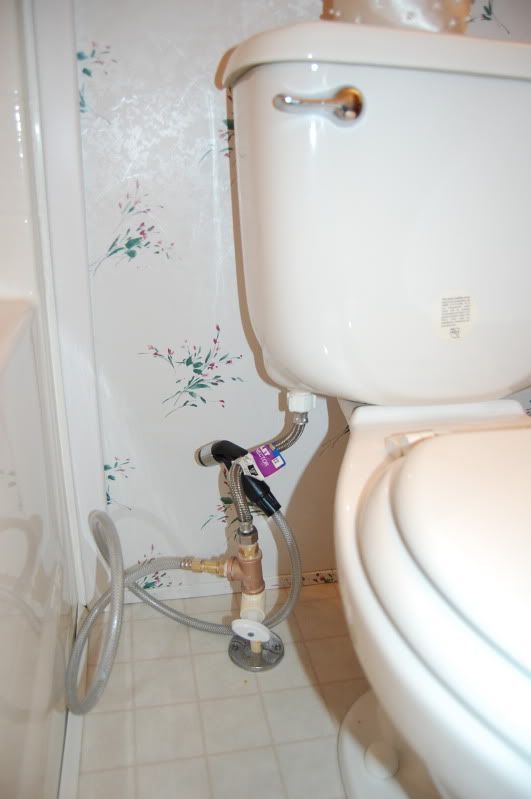
Here is what it looks like all set up, we just need to get a hook or something to put the actual sprayer on
No comments:
Post a Comment